Thursday, June 26, 2014

GARAGE SALE!!! DEBT SNOWBALL UPDATE!!!!

Last week was it!  We finally had a garage sale!  I think Zach and I moved boxes labeled “garage sale” to three different houses.  Well, that stuff is out, and it is out for good!  Our biggest category by far was baby stuff.  Tu grows like a weed, so we had clothes up to 12 months and all her little baby stuff (*tear).  Out with the old, in with the…well, I guess the new us!  We’re using all the proceeds to get out of debt, not buy stuff to replace the stuff we sold.  We already sold some larger items (see our post from May 8th), but I had no desire to take picture after picture of all of the outfits Turner has outgrown.  While we know things don’t always go to plan, Zach and I aren’t planning on having any more babies for quite a while.  By then, even if we had another girl, all the stuff would be super outdated.  Some concerns over us selling as much as possible have been brought to my attention.  Right now, the best thing we can do, not only for Turner but our future children as well, is get out of debt.


Prep:  My family used to have a HUGE garage sale at my Mamaw’s (that’s Southern for “Grandma”) house every year.  I don’t think any of us are particularly sentimental about our stuff, so we had no shortage of things to sell.  My mom let me keep the money from my sales which I would promptly spend at either our saleor others in the neighborhood.  I remember them fondly.  


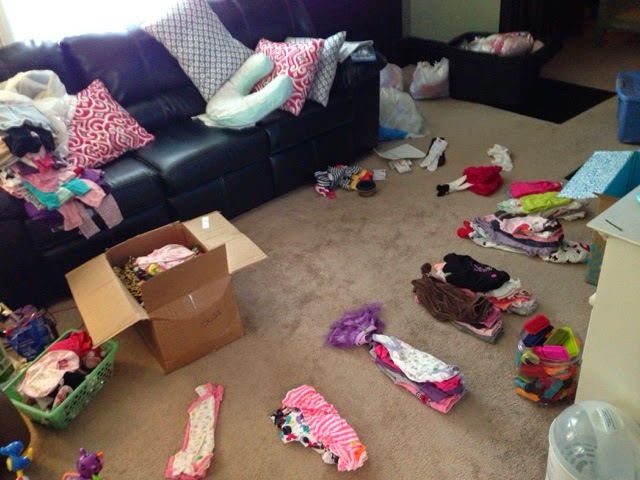
  Fast-forward 15 years later, and now I actually have to go through the stuff and decide what to get rid of.  I usually purge clothes about once a year (if I didn’t wear it in a year, I probably don’t need it), and I went on a mad spree after Tu was born.  I never wanted to see maternity clothes again! Poof, gone. Tu’sstuff is easier, because it doesn’t fit her, so she has zero use for it.  I saved a couple special pieces (the outfit she came home in, some shoes) and the rest is out of our lives!  Zach did a great job of going through alllllll his books (trust me, all those “l”s are necessary). Together, we had one part of a multi-family sale!


  Advertising is key in having a good turnout.  Our local, free newspaper has a garage sale section that’s updated every week.  We’ve gone to that section to find sale before, and we’re sure we’re not the only ones.  Mama bought an ad to run the week before and the week of the sale.  She also put up colorful signs not only on her street (where it intersects the main street and a guiding sign a little further down) but also at Kroger and Walmart.  Zach and I posted on Facebook about it the morning of the beginning of the sale.  In hindsight, we should have been posting every day that week.  


  The turnout was good on Thursday, okay on Friday, and virtually non-existent on Saturday.  We couldn’t believe it.  Then we drove up the street.  Someone had taken down our signs at the intersection and halfway down the road.  We were bummed.  Of course, we didn’t discover this until the sale was over.

We made $112 dollars.  We were hoping for closer to $200, butit’s $112 we didn’t have before!  We took all the baby stuff that didn’t sell to the Crisis Nursery.  It is a fantastic charity that offers free daycare and services to mothers that are out of options.  They offer everything donated for free to these women. I volunteered there in junior high, and it was an amazing experience.  They were super grateful and even showed us around the facility!  I couldn’t be happier with our choice to donate to them. Don’t live in the Peoria area?  They have locations nationwide!  Google it!


  We had a furniture piece that didn’t sell, and my cousin took it for their Alzheimer’s Benefit auction that they throw every year.  She actually donated all of her sales to the Alzheimer’s Foundation.  We can’t wait to do that someday when we’re out of debt.

So, it did not go as well as we hoped.  Things we learned:

Post on Facebook till people block you because you’re so annoying.
Location, location, location isn’t just for selling real estate. Have garage sales in a visible place.  Exception: a neighborhood sale.
Make sure you have a lot/most of the stuff sitting out in the driveway/on the sidewalk.  There’s something a little creepy about going in someone’s dark garage.

  Mama and my Aunt Diana did a great job of keeping the sale organized, and Mama is great with haggling.  We had our best people on the job, and we just didn’t get the traffic we expected.  But, I guess now we know!

  Zach is listing books and DVDs we didn’t sell.  Look for a post on that soon!


DEBT SNOWBALL UPDATE!!!

Turner is officially paid off!!!  In other words, my hospital bill from Tu being born is paid in full!  We have moved on to my smallest student loan.  We started attacking it about a week and a half ago, and it has gone from over $900 down under $500!  Woo!  It’s happening!

Tuesday, June 10, 2014

Woodworking… Say What?

Lately, I’ve been on a project kick.  If someone needs a gift, they get something homemade out of a piece of wood.  People that have been gifted with a Tara original include my mama (her birthday AND Mother’s Day), Emily (wedding gift), Liz (another wedding gift), and Missy (yet another wedding gift, terribly belated).  They didn’t all get the same thing. I’m not a factory.  Some gifts were similar, but with distinct differences (Mama and Liz).  Admittedly, I stole these ideas from other blogs.  Instead of posting step-by-step instructions, I’ll give you links to the other blogs, and tell you about any changes I made to my projects.


1) Mama’s Birthday
 Present (stolen from thehandmadehome.net)

So, the chick at thehandmadehome.net did her last name and number of people in her family.  Well, the Williams 2 didn’t have the same ring to it.  Since Mama and Brian have three girls, I did “Our Fab 3”.  Mama made a supplement to this which I’ll share another day (super cool picture display). Thehandmadehome woman used a projector to trace her letters.  I just printed mine in extra huge fonts.  I went to Menards and dug through the remnant bin.  Enter: mistake.  I was only checking the boards for similar lengths (as you can see in the picture, I didn’t succeed, but I thought it was quirky).  When I got home, I noticed one of the boards was smiling.  Also, most big box stores (Lowes, Menards, Home Depot, etcare supposed to cut boards for you.  Not my Menards (which made we wonder why they had a remnant board section… they’re cutting boards for someone!).  I don’t have a saw or a truck to haul full length lumber.  If you do, great!  Note: do not listen to the guy selling nails when you know a 1” nail won’t do much when you’re working with a 1” thick board.  Good thing I used wood glue.


2) Liz’s Wedding Present (I guess it’s Kevin’s wedding present too.)

Next project was pretty much the same as Mama’s, but different fonts, dimensions, and paint color.  This time I went to Lowes (I learned) and had them cut a perfectly straight board for me.  I also got 1-1/4” nails (you could also use screws, but I’m impatient and can’t spend the time drilling a pilot hole).  I couldn’t wait until the wedding, so I showed this to the couple before the wedding.  Patience is clearly not a virtue I possess.  


3) Emily’s Wedding Present

This one is an oldie, but a goodie.  I made this last year, super pregnant, on the floor in our dining room (we had just moved in maybe a week or two before).  I saw state nail art onEtsy and Pinterest, and decided I didn’t need to pay that much to make it.  I got a scrap piece of wood from Mama and Brian’s house (I think it was a 2x10, about 15” long, but I’m not sure), some nails, and some string.  Emily and her hubby, Josh, got married in Alabama, but they (inconveniently for me) had the wedding in Gulf Shores, at the very bottom of the state.  This made the super cute heart that is usually negative space a little tricky.  I just used her other wedding color and filled in the heart.  To get the outline of Alabama, I printed a map on legal paper, taped it to the wood, and started putting nails around the outline (hammered about halfway in).  I didn’t count, but it came out to exactly 100 nails for the outline and 20 for the heart.  Afterward, I just ripped the paper off (I was a little scared that it would pull some nails out, but it didn’t).  Then I ran string from each nail to the outside of the heart.  In hindsight, I would have 1) not strung an outline of the state, 2) left the wood plain, I would’ve stained it, and 3) been more meticulous about my string to nail ratio.  I think it turned out pretty well, regardless.


4) Mother’s Day 
Present for Mama (from shanty-2-chic.com)

While I was at Lowes getting lumber for Liz’s wedding present, I also had a 2x12 cut down into 15” pieces.  This one I pretty much followed exactly, except I just used more nail heads to fasten the pictures I chose.  Mama ended up using some double-sided tape to hold down the corners that weren’t nailed.  Project redo: I would’ve used chalkboard paint instead of the free print out so Mama could change what it said.  


5
5) Missy’s SUPER Late Wedding Present

I guess the best way to describe this one is as a hybrid of the Mother’s Day project and the Mama’s birthday/Liz’s wedding projects.  Missy and Liz were both super excited about their married last names, so I knew I wanted to integrate them in their presents.  I saw some tutorials online about how to transfer a photo to a piece of wood, so I decided to try it out for Missy.  I had a bunch of the blocks of wood from the Mother’s Day project, so I used that.  I Googled “country sunrise” (because Missy is my fave country girl!) to use for the photo transfer.  You have to print the picture on regular, copy paper from a laser printer.  I read that laser printers deposit more ink than inkjet printers, so the transfer is more complete.  It also seems like the ink is sort of floating on top of the paper rather than soaked into it.  I printed my photo on legal size paper (it was a panoramic shot, so it wasn’t distorted).  I had to buy some Modge Podge (MP) for this one, but it was so worth it.  I got to use my new orbital sander for the first time, and sanded the crap out of that wood (she’s got little ones, so I rounded the edges quite a bit)!  Then I wiped it off with a damp towel to get all the sand dust.  I poured a little MP and spread it where I thought the picture would go in a thin layer across the wood.  I laid the picture ink side down on the MP while it was still wet.  I tried my best to center it.  After it dried overnight, I covered the whole piece of paper with a more-than-damp-but-not-soaking-wet-towel for a few minutes.  I used that same towel to kind of scrub the paper off (this whole process is reminiscent of the temporary tattoos of my childhood).  I did mine in two rounds, peeling/scrubbing two layers.  My towel started to rub some of the picture off, so I switched to my fingers.  Certain parts of the picture are more, um, rustic than I had hoped, but I’m rolling with it.Next time I’ll probably use a thicker layer of MP.  I think I might have been a little stingy.  Also, my picture didn’t go all the way to the edges.  This was an issue after I did the letters…

I’m a bit of a font junkie, so finding the perfect one waskey.  I wanted the piece to feel a little western, so I Googled “western font”, and found a free website that made her last name a picture.  Then I copied and pasted the text “picture” into word and resized it super big.  That’s as technical as I get with this one.  It was tricky, and I’m sure there was an easier way to do it in Photoshop, but I was done messing with it (this was about 45 min into font searching).  The letters were about a page tall each.  Turned out, they were too wide, so I manually cut and pasted them (literally with scissors and tape).  After editing the letters, I traced them and painted around my lines.  I was super impressed with myself until I realized the “R” at the end of “BAKER” looked super bad since the picture didn’t go to the edge.  I got out my little paint brush and some stain, and fixed it right up!  (Note: I thought about staining the entire thing before I transferred the picture, but I’m really glad I didn’t.  The picture turned out darker than I expected on the wood even though the wood was pretty light.)  

She got it, and she loved it!  I think it’s my favorite so far!

I’m sure my instructions are by no means complete, so please ask if you have questions on how I did something!

Do you have any favorite homemade gifts given or received?